5 Essential Checks Before Hooking Up to an RV Campground Water Supply
Are you aware of the potential risks associated with hooking up to an RV campground water supply without proper checks? Ensuring the safety and quality of the water is crucial for a pleasant and healthy camping experience.
Inspecting your RV’s water system before connecting to a campground’s water supply is vital. This includes checking the condition and integrity of your water hose, pressure regulator, and connections to prevent contamination and damage.
By taking these precautions, you can enjoy a safe and refreshing camping experience. So, what are the essential checks you should perform?
Key Takeaways
- Inspect the water hose for damage and contamination.
- Check the pressure regulator to prevent damage to your RV’s plumbing.
- Ensure all connections are secure to prevent leaks.
- Verify the water supply’s quality and safety.
- Use a water filter or treatment if necessary.
The Importance of Safe Water Connections for RV Camping
RV campers must be vigilant when connecting to campground water supplies to safeguard their health and the integrity of their vehicle’s plumbing. Safe water connections are crucial for a comfortable and enjoyable RV camping experience.
Health and Safety Concerns with Campground Water
Campground water can be contaminated with various substances, posing significant health risks to RV occupants. Contaminants such as bacteria, viruses, and heavy metals can cause a range of health issues, from mild gastrointestinal problems to serious illnesses. “According to the Centers for Disease Control and Prevention (CDC), waterborne diseases are a significant public health concern, especially in recreational settings like RV campgrounds.”
Protecting Your RV’s Plumbing System
Failing to properly connect to the campground water supply can also damage the RV’s plumbing system. High water pressure can cause hoses to burst, fittings to leak, and other components to fail, leading to costly repairs. By following rv water connection tips, such as inspecting hoses and using pressure regulators, RV owners can protect their plumbing system and ensure a safe and enjoyable camping experience.
By understanding the importance of safe water connections and taking the necessary precautions, RV campers can enjoy their time on the road while minimizing the risk of health issues and plumbing damage.
Understanding Your RV’s Water System Components
To ensure a safe and enjoyable RV camping experience, it’s crucial to understand the components of your RV’s water system. A typical RV water system consists of several key parts that work together to provide a reliable water supply.
Fresh Water Tank vs. Direct Connection
Your RV’s water system can be filled either by using the fresh water tank or by connecting directly to an external water source. The fresh water tank allows you to store water for later use, while a direct connection provides a continuous water supply. Understanding the differences between these two options is essential for managing your water resources effectively.
Key Components: Hoses, Regulators, and Filters
The quality of your RV’s water system depends on several critical components, including hoses, regulators, and filters. Hoses transport water from the source to your RV, while regulators ensure that the water pressure remains within a safe range. Filters, on the other hand, remove contaminants and impurities from the water, making it safe for consumption.

City Water Connection vs. Gravity Fill
RV owners can choose between a city water connection and a gravity fill to fill their fresh water tank. A city water connection uses pressurized water from an external source, whereas gravity fill relies on gravity to fill the tank. Understanding the advantages and limitations of each method is vital for maintaining your RV’s water system.
5 Things to Check Before Hooking Up to an RV Campground Water Supply
Before connecting your RV to a campground water supply, it’s crucial to perform a series of safety checks to protect your vehicle’s plumbing system. These checks are designed to ensure that your water supply is safe, clean, and properly pressurized.
Overview of Essential Safety Checks
Performing safety checks before hooking up to the campground water supply involves inspecting several key components. This includes checking the water pressure, verifying water quality, examining the condition of your water hose, confirming proper fitting connections, and testing your pressure regulator functionality. These checks are vital to preventing damage to your RV’s plumbing system.
Why These Checks Matter for Your RV’s Longevity
The longevity of your RV’s plumbing system depends on the proper execution of these safety checks. Neglecting these checks can lead to issues such as leaks, contamination, and excessive wear on your plumbing components. By taking the time to perform these checks, you can avoid costly repairs and ensure a safe and enjoyable camping experience.
| Check | Purpose | Benefit |
|---|---|---|
| Water Pressure Check | Ensure safe pressure levels | Prevents damage to plumbing |
| Water Quality Verification | Confirm water is safe to use | Protects against contamination |
| Hose Condition Inspection | Identify wear or damage | Prevents leaks and failures |
Creating a Pre-Connection Checklist

To simplify the process, create a pre-connection checklist that includes the essential safety checks. This will help ensure that you never overlook a critical step.
By following these guidelines and performing the necessary checks, you can enjoy a safe and worry-free RV camping experience.
Essential Check #1: Inspect Water Pressure at the Campground Spigot
To avoid potential damage to your RV’s plumbing, checking the water pressure at the campground spigot is essential. Water pressure that is too high or too low can cause significant issues, from leaks and burst hoses to reduced water flow and appliance malfunction.
Why Water Pressure Matters for Your RV
Water pressure is a critical factor because it directly affects the integrity and functionality of your RV’s plumbing system. High water pressure can lead to leaks, burst hoses, and damage to appliances, while low water pressure can result in inadequate water supply, affecting your overall camping experience.
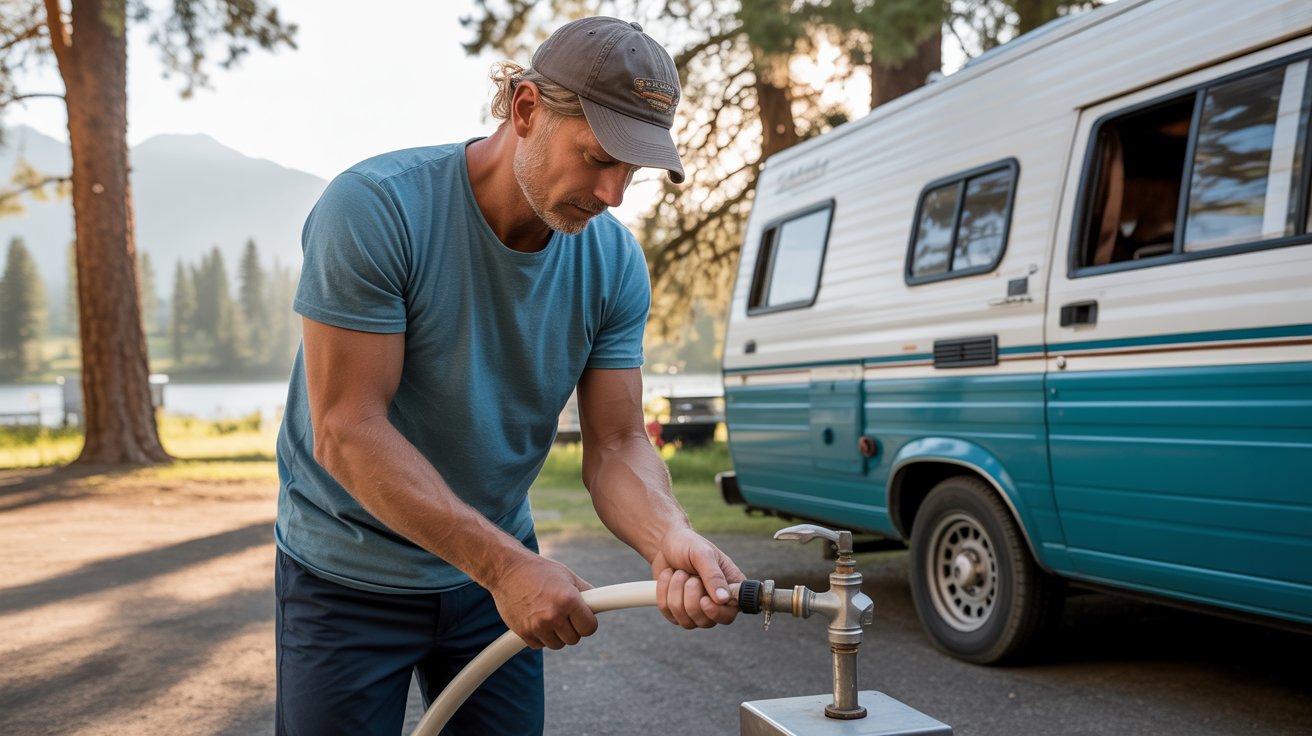
How to Test Campground Water Pressure
Testing water pressure is relatively straightforward. You’ll need a water pressure gauge, which can be purchased at most hardware or RV supply stores. Simply attach the gauge to the campground spigot, turn on the water, and take a reading. It’s a good idea to check the pressure at different times, as it can fluctuate based on campground usage.
. The gauge is mounted on a brushed metal panel, with a chrome bezel and a clean, minimalist design. The lighting is soft and directional, casting subtle shadows that accentuate the gauge's details. The background is blurred, creating a sense of focus on the essential component. The overall mood is one of precision, functionality, and attention to detail, perfectly suited for the \"Essential Check #1: Inspect Water Pressure at the Campground Spigot\" section of the article.")
Safe Pressure Ranges for RV Plumbing Systems
Most RV plumbing systems are designed to operate safely within a water pressure range of 20-60 psi. Pressures above 60 psi can be dangerous, potentially causing damage to hoses, connections, and appliances. If the pressure is too high, consider using a pressure regulator to bring it within a safe range.
By inspecting the water pressure at the campground spigot, you can take proactive steps to protect your RV’s plumbing system, ensuring a safe and enjoyable camping experience.
Essential Check #2: Verify Water Quality and Clarity
One of the critical checks before hooking up to an RV campground water supply is verifying its quality. Ensuring the water is clean and safe to use is vital for the health and safety of everyone on board.
Visual Inspection Techniques
A simple yet effective way to start is by visually inspecting the water. Look for any visible signs of contamination such as sediment, cloudiness, or unusual color. Fill a clear glass with water from the campground spigot and hold it up to the light. If the water appears cloudy, dirty, or has particles floating in it, it may indicate poor water quality.
Key things to look for during a visual inspection include:
- Cloudiness or turbidity
- Visible particles or sediment
- Unusual color or staining
Testing for Contaminants
Beyond visual inspection, testing for contaminants is a more thorough way to verify water quality. You can use water testing kits specifically designed for RVs. These kits can check for various contaminants, including bacteria, viruses, and nitrates. Some campgrounds may also provide information on their water quality, so it’s worth asking the campground staff.
| Contaminant | Testing Method | Potential Health Risk |
|---|---|---|
| Bacteria (e.g., E. coli) | Water testing kits | Gastrointestinal illness |
| Nitrates | Water testing kits | Blue baby syndrome, health issues in adults |
| Viruses | Advanced water testing | Various viral infections |
Regional Water Quality Considerations
Water quality can vary significantly depending on the region due to differences in source water, treatment processes, and environmental conditions. For instance, areas with agricultural runoff may have higher levels of nitrates, while regions with older infrastructure might have issues with lead contamination.
As noted by water quality experts:
“Regional variations in water quality highlight the importance of local knowledge and regular testing to ensure safe drinking water.”

Essential Check #3: Examine Your Water Hose Condition
When it comes to RV camping, ensuring the integrity of your water hose is crucial for a safe and enjoyable experience. Your water hose is a critical component of your RV’s plumbing system, and its condition can significantly impact the quality of water you use during your trips.
Identifying Wear, Damage, and Leaks
Regularly inspecting your water hose for signs of wear, damage, or leaks is vital. Look for cracks, frays, or soft spots along the hose’s length, and check the fittings for any signs of damage or corrosion. A damaged hose can lead to leaks, contamination, and even bursts under pressure.
- Check for kinks or twists that could restrict water flow.
- Inspect the hose’s outer layer for signs of abrasion or cuts.
- Verify that all connections are secure and not leaking.
Proper Hose Storage and Maintenance
Proper storage and maintenance of your water hose can extend its lifespan and prevent damage. Always drain the hose after use and store it in a cool, dry place, away from direct sunlight. Avoid coiling the hose too tightly, as this can cause kinking or damage to the inner lining.
Using a drinking-water safe hose is essential for maintaining water quality. Look for hoses that are labeled as “safe for potable water” to ensure they meet the necessary standards.
Choosing the Right Drinking-Water Safe Hoses
When selecting a water hose for your RV, choose one that is designed for potable water use. These hoses are made from materials that are safe for drinking water and can withstand the rigors of outdoor use. Consider a hose with a UV-resistant coating to protect against sunlight damage.

By examining your water hose condition and following proper storage and maintenance procedures, you can ensure a safe and reliable water supply for your RV adventures. This is an essential part of your rv water supply checklist, helping you to enjoy your camping experiences with peace of mind.
Essential Check #4: Confirm Proper Fitting Connections
Proper fitting connections are the backbone of a safe and leak-free RV water system. Ensuring these connections are secure and correctly fitted is vital to prevent leaks, damage, and potential health hazards.
Inspecting Threaded Connections and Gaskets
Inspecting threaded connections and gaskets is a critical step in maintaining your RV’s water system. Look for signs of wear, damage, or mineral buildup on the threads and gaskets. Any damage or wear can lead to leaks or contamination. Regular inspection helps in identifying potential issues before they become major problems.
Using Thread Tape and Sealants Correctly
Using thread tape and sealants correctly is essential for creating a watertight seal. Apply thread tape in the correct direction (typically clockwise) and avoid over-tightening, which can damage the threads. For certain connections, using a suitable sealant can provide an additional layer of protection against leaks.
Preventing Cross-Threading and Connection Damage
Preventing cross-threading and connection damage requires care and attention to detail. When making connections, ensure they are aligned properly before tightening. Use the correct tools to avoid damaging the fittings, and never force a connection that doesn’t align.
| Connection Type | Inspection Focus | Prevention Tips |
|---|---|---|
| Threaded Connections | Signs of wear, damage, or mineral buildup | Use thread tape correctly, avoid over-tightening |
| Gaskets and Seals | Damage, wear, or improper seating | Inspect regularly, replace as needed |
By following these guidelines and inspecting your RV’s water connections regularly, you can ensure a safe and enjoyable camping experience.
Essential Check #5: Test Your Pressure Regulator Functionality
To safeguard your RV’s plumbing, verifying the pressure regulator’s functionality is a must before connecting to campground water. A pressure regulator is a critical component that ensures the water pressure from the campground supply doesn’t damage your RV’s pipes and fixtures.
Why Pressure Regulators Are Non-Negotiable
Pressure regulators are essential because they prevent high water pressure from damaging your RV’s plumbing system. High pressure can lead to leaks, burst hoses, and even damage to your RV’s internal components. A good quality pressure regulator will help maintain a safe and consistent water pressure, usually around40-60 psi, which is ideal for most RVs.
Using a pressure regulator is not just a precaution; it’s a necessity for protecting your investment. Without one, you’re risking costly repairs and potential safety hazards.
Signs Your Regulator Needs Replacement
If your pressure regulator is old or malfunctioning, it may not provide the protection your RV needs. Signs that your regulator needs replacement include:
- Leaks around the regulator
- Inconsistent water pressure
- Visible damage or corrosion
If you notice any of these signs, it’s time to replace your pressure regulator to ensure continued protection for your RV’s plumbing system.
Adjustable vs. Fixed Pressure Regulators
There are two main types of pressure regulators: adjustable and fixed. Adjustable regulators allow you to set the output pressure to a specific level, which can be useful if you’re unsure of the optimal pressure for your RV. Fixed regulators, on the other hand, are pre-set to a specific pressure, usually around45 psi, and are often more straightforward to use.
Both types have their advantages, and the choice between them depends on your specific needs and preferences. Regardless of the type, ensuring your pressure regulator is functioning correctly is crucial for safe and enjoyable RV camping.
Essential Water Filtration for RV Camping Safety
When venturing into the great outdoors, having a robust water filtration system is vital for ensuring RV camping safety. Water filtration plays a critical role in providing access to clean drinking water, protecting both your health and your RV’s plumbing system.
Types of RV Water Filters and Their Benefits
There are several types of RV water filters available, each offering unique benefits. Activated carbon filters are effective at removing chlorine, taste, and odor from water. Mechanical filters can capture particulate matter and sediment, while reverse osmosis systems provide a high level of contaminant removal.
- Activated carbon filters: Improve taste and odor
- Mechanical filters: Remove particulate matter and sediment
- Reverse osmosis systems: High-level contaminant removal
Multi-Stage Filtration Systems for Maximum Protection
For maximum protection, consider a multi-stage filtration system. These systems combine different types of filters to provide comprehensive water purification. A typical multi-stage system might include a sediment filter, followed by an activated carbon filter, and finishing with a reverse osmosis membrane.
| Filtration Stage | Function | Benefits |
|---|---|---|
| Sediment Filter | Removes particulate matter | Protects subsequent filters |
| Activated Carbon Filter | Removes chlorine, taste, and odor | Improves water taste and quality |
| Reverse Osmosis Membrane | Removes dissolved contaminants | Provides high-level purification |
By understanding the different types of RV water filters and their benefits, you can make an informed decision to ensure safe drinking water during your RV camping adventures.
Troubleshooting Common RV Water Connection Problems
RV campers often encounter water connection issues, but knowing how to address them can make all the difference. When hooking up to an RV campground water supply, it’s not uncommon to face problems that can disrupt your camping experience. In this section, we’ll explore common issues and provide practical solutions to ensure a smooth and enjoyable trip.
Dealing with Low Pressure Issues
Low water pressure can be a significant issue when connecting to an RV campground water supply. To address this, first check the campground’s water pressure and compare it to your RV’s recommended operating pressure. If the pressure is too low, consider using a water pressure booster pump to enhance the flow. Additionally, inspect your RV’s water system for any kinks or blockages in the hoses that might be contributing to the low pressure.
Addressing Leaks and Connection Failures
Leaks and connection failures are common problems that can lead to water waste and damage to your RV. Regularly inspect your water hoses and connections for signs of wear or damage. Use a mixture of water and dish soap to detect leaks; bubbles will form where leaks are present. Tightening loose connections or replacing damaged parts can often resolve these issues. For persistent problems, consider consulting a professional for assistance.
When to Seek Professional Help
If you’re unable to resolve water connection issues on your own, it may be time to seek professional help. Signs that you need expert assistance include persistent leaks, significant water pressure fluctuations, or damage to your RV’s plumbing system. Professionals can diagnose and fix complex problems, ensuring your RV is safe and functional for future camping trips.
By understanding how to troubleshoot common RV water connection problems, you can enjoy a more stress-free and enjoyable camping experience. Remember to always follow rv water connection tips and take necessary precautions when hooking up to an rv campground water hookup.
Conclusion: Ensuring Safe and Reliable Water Supply for Your RV Adventures
Ensuring a safe and reliable water supply is critical for an enjoyable RV camping experience. By performing the 5 essential checks outlined in this article, RV owners can help prevent damage to their plumbing system and ensure access to clean drinking water.
A thorough rv water system inspection is vital before connecting to any campground water supply. This includes inspecting water pressure, verifying water quality, examining the condition of your water hose, confirming proper fitting connections, and testing your pressure regulator functionality.
By following the rv water supply checklist and staying vigilant about your RV’s water system, you can enjoy your adventures with confidence, knowing that you have taken the necessary steps to protect your RV and your health.