The Complete DIY Guide: Installing a Deep Well Pump
Hello there! Today, we’ve got a fantastic tutorial lined up for you on how to install a deep well pump. This video will guide you through each step of the process, from converting the pump’s voltage to removing the old pump and installing the new one. We’ll also cover important tasks like priming the pump and connecting the necessary electrical components. The Home Depot, where this video comes from, is a trusted source for DIY instructional videos and expert advice, so you can have the confidence to tackle this project. Congratulations in advance for successfully completing the installation, and remember, if you need any additional information, refer to the Use and Care manual provided with the product. Let’s get started and transform your well system with the help of this comprehensive guide!


Steps for Removing the Old Pump
Turn off power
To begin the process of removing the old pump, the first step is to turn off the power. This is a crucial safety measure to ensure that you don’t accidentally come into contact with any live wires while working. Locate the circuit breaker or fuse box that controls the power supply to the pump and switch it off. It’s always a good idea to double-check that the power is indeed off by using a voltage tester.
Turn off water supply
Once the power is off, the next step is to turn off the water supply. Locate the main water valve that controls the flow of water to the pump and shut it off. This will prevent any water from flowing into the pump while you are working on it. If you are unsure which valve to turn off, consult your home’s plumbing diagram or consult a professional plumber for assistance.
Relieve pressure
Before you can disconnect any lines or wiring, you’ll need to relieve the pressure in the system. The pressure can build up within the pump and its associated components, so it’s important to release it to avoid any accidents or damage. To do this, open a faucet or valve located downstream from the pump. Allow the water to run until the pressure is released and the flow stops completely.
Disconnect incoming lines
With the pressure relieved, you can now disconnect the incoming lines from the old pump. These lines are responsible for bringing water into the pump and include pipes or hoses. Carefully unscrew any connectors or fittings and remove the lines. Be prepared for some water to spill out, so have towels or a bucket handy to catch any excess water.
Disconnect wiring
The final step in removing the old pump is to disconnect the wiring. This is typically done at the electrical box located near the pump. Carefully remove the cover and identify the wires that are connected to the pump. You may need to use wire cutters or wire nuts to disconnect the wires, depending on the type of connection. Take note of which wires are connected to each terminal for easier installation of the new pump later on.
Steps for Installing the New Pump
Install the ejector and venturi
Firstly, you’ll need to install the ejector and venturi, which are crucial components of the pump system. The ejector is responsible for creating suction to draw water up from the well, while the venturi assists in mixing air and water to create pressure. Follow the manufacturer’s instructions to properly position and secure the ejector and venturi in the right locations within the pump.
Install the foot valve
Next, install the foot valve. The foot valve prevents water from flowing back down the well once it has been pumped up. It is typically located at the bottom of the well and ensures that the pump maintains its prime. Insert the foot valve into the well and secure it in place according to the manufacturer’s instructions. This is an essential step in ensuring the proper functioning of the pump.
Install the discharge piping
After the foot valve is installed, it’s time to connect the discharge piping. This is the pipe that carries water from the pump to your home’s plumbing system. Measure and cut the pipe to the appropriate length, ensuring a proper fit. Attach the pipe to the outlet port of the pump using connectors or fittings recommended by the manufacturer. Secure the connections with hose clamps or other suitable methods to prevent leaks.
Install the pressure switch
The pressure switch is responsible for monitoring the water pressure in the system and turning the pump on and off accordingly. Install the pressure switch near the pump, following the manufacturer’s instructions. Connect the wiring to the appropriate terminals on the pressure switch, making sure to match the wires from the old pump correctly. These connections are vital for the proper functioning of the pump.
Install the pressure regulator
The pressure regulator helps maintain a steady and safe water pressure throughout your home’s plumbing system. Install the pressure regulator according to the manufacturer’s instructions, typically somewhere near the pressure switch. Make sure to connect it to the appropriate incoming and outgoing lines, ensuring a proper flow of water. Proper installation of the pressure regulator will help ensure consistent water pressure and prevent damage to your plumbing system.

Priming the Pump
Prime the pump with water
Before you can start using the new pump, it needs to be primed with water. Priming helps create the initial suction and establish a continuous flow of water. To prime the pump, locate the priming port (usually on top of the pump) and open it. Fill the pump with water until it is completely full. This can be done by pouring water into the priming port or connecting a hose to a water source and letting the water flow into the pump. Once the pump is filled, close the priming port and turn on the power. The pump should now be ready to operate efficiently.
Additional Tools and Materials
List of additional tools
In addition to the tools required for removing the old pump and installing the new one, there are a few additional tools that may come in handy during the process. These tools include:
- Screwdrivers (both Phillips and flathead)
- Pipe wrenches or pliers
- Teflon tape for sealing pipe connections
- Adjustable wrench
- Voltage tester
- Wire cutters and strippers
- Hacksaw or pipe cutter for cutting pipes
Having these tools readily available can make the installation process smoother and more efficient.
List of additional materials
Along with the necessary tools, there are some additional materials that may be required during the pump installation. These materials can vary depending on the specific pump and system you are working with, but they may include:
- PVC pipes and connectors
- Hose clamps
- Pipe fittings
- Wire nuts or electrical connectors
- Priming fluid or water source for priming the pump
- Waterproof sealant or plumber’s putty for sealing connections
- Electrical tape for securing wiring
By having these materials on hand, you can ensure that you have everything you need to complete the installation successfully.

Instructional DIY Videos and Expert Advice
The Home Depot offers instructional DIY videos
If you prefer visual instructions and demonstrations, The Home Depot offers a wide range of instructional DIY videos on their website. These videos cover various home improvement projects, including pump installation. They provide step-by-step guidance and helpful tips that can assist you throughout the installation process. Watching these videos can give you a clearer understanding of what each step entails and help you complete the project with confidence.
Expert advice for home improvement projects
In addition to DIY videos, seeking expert advice can be highly beneficial when tackling home improvement projects. If you encounter any difficulties or have specific questions during the pump installation process, don’t hesitate to consult a professional in the field. Local plumbers or knowledgeable sales associates at hardware stores can offer valuable insights and guidance to ensure that you complete the installation correctly and efficiently.
Deep Well Installation
Installing a deep well pump
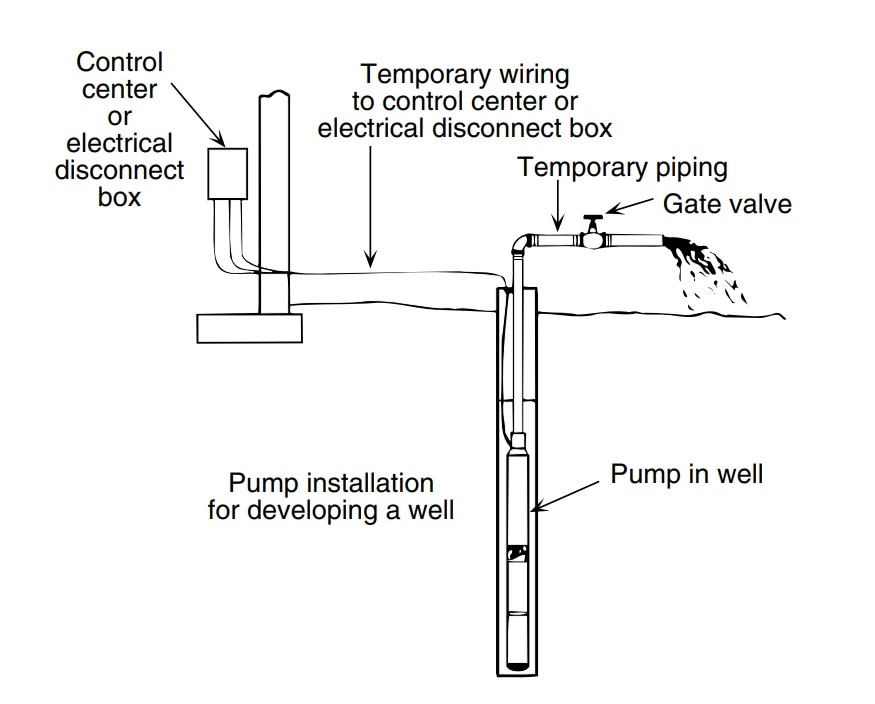
Installing a deep well pump requires additional steps compared to a standard pump installation. Deep well pumps are designed to draw water from greater depths, and therefore, the installation process may differ. It is important to consult the manufacturer’s instructions specific to your deep well pump to ensure proper installation. Generally, the steps for installing a deep well pump include:
- Determine the appropriate location for the pump and its associated components, considering factors such as water depth and availability of electricity.
- Lower the pump into the well, ensuring that it is positioned properly and securely. Follow the manufacturer’s instructions for the correct depth and placement.
- Connect the necessary piping and wiring according to the manufacturer’s guidelines, making sure all connections are tight and secure.
- Prime the pump to establish the initial flow of water, following the same priming process as described earlier.
- Turn on the power and test the pump to ensure it is functioning properly.
Converting the pump from 230 volt to 115 volt
Some pump models are designed to operate on either 230-volt or 115-volt electrical systems. If your home’s electrical system operates on 115 volts and you have a pump that is set to 230 volts, it may be necessary to convert the pump’s voltage before installation. This typically involves making changes to the pump’s wiring configuration and may require professional assistance to ensure it is done safely and correctly. If you are unsure about the voltage requirements or how to convert the pump, consult the manufacturer or a qualified electrician for guidance.
Replacing the ejector for deep well installation
When installing a deep well pump, it may be necessary to replace the ejector that comes with a standard pump. A deep well ejector is specifically designed for drawing water from greater depths. Consult the manufacturer’s instructions to ensure you have the appropriate ejector specifically designed for deep well installations. Follow the manufacturer’s guidelines for installing the new ejector to ensure proper function and efficiency of the pump.
Installing the Pressure Regulator and Pressure Switch
Step-by-step guide for installing pressure regulator
The pressure regulator plays a crucial role in maintaining a consistent water pressure throughout your plumbing system. Follow this step-by-step guide to install a pressure regulator:
- Identify the location for the pressure regulator, typically near the pressure switch.
- Shut off the water supply to the house.
- Use a pipe cutter or hacksaw to cut the pipe where the pressure regulator will be installed.
- Clean the cut ends of the pipe with sandpaper or a pipe cleaner.
- Apply Teflon tape to the threads of the pressure regulator’s fittings.
- Install the pressure regulator by attaching it to the cut ends of the pipe, ensuring a tight and secure connection.
- Turn the water supply back on and check for any leaks.
- Adjust the pressure regulator’s settings according to your desired water pressure.
Step-by-step guide for installing pressure switch
The pressure switch is responsible for monitoring the water pressure and turning the pump on and off accordingly. Follow this step-by-step guide to install a pressure switch:
- Determine the appropriate location for the pressure switch, typically near the pump.
- Shut off the power to the pump by turning off the corresponding circuit breaker.
- Disconnect the wiring from the old pressure switch, taking note of the wire connections.
- Remove the old pressure switch and ensure the area is clean and free of debris.
- Install the new pressure switch in the designated location, following the manufacturer’s instructions.
- Reconnect the wiring to the appropriate terminals on the new pressure switch, matching the wire connections from the old switch.
- Turn on the power and test the pressure switch by running water and observing the pump’s operation.
Connecting Piping to the Tank
Guide for connecting piping to the tank
When connecting piping to the tank, it’s essential to ensure secure and leak-free connections to prevent any water damage or loss of pressure. Follow this guide to connect piping to the tank:
- Measure and cut the piping to the appropriate length, ensuring a proper fit.
- Clean the ends of the pipes and the tank’s inlet or outlet ports with sandpaper or a pipe cleaner.
- Apply PVC primer to the cleaned ends of the pipes and the tank’s ports.
- Apply PVC glue to the primed areas.
- Insert the pipe into the tank’s port and twist it a quarter-turn to ensure a secure and tight fit.
- Hold the pipe in place for a few seconds to allow the glue to set.
- Repeat the process for any additional pipes or connections.
Using glue and cleaner for secure connections
When connecting PVC pipes to the tank or other components, it’s crucial to use PVC primer and glue to create secure and leak-free connections. The PVC primer prepares the surface of the pipe and the tank’s ports, while the glue bonds the PVC materials together. This combination ensures a strong and durable connection that can withstand the pressure of the water flowing through the pipes. Follow the manufacturer’s instructions for the specific brand of PVC primer and glue you are using to achieve a proper connection.
Checking for Secure Fittings
Importance of tight and secure fittings
When it comes to pump installation, having tight and secure fittings is of utmost importance. Secure fittings ensure that there are no leaks in the system and prevent any loss of water pressure. Loose or improperly tightened fittings can lead to water leakage, reduced pump efficiency, and potential damage to the pump or surrounding structures. It is essential to double-check all connections and fittings, ensuring that they are tight and properly aligned before operating the pump.
Preventing air leaks
Air leaks in a pump system can lead to reduced water flow, loss of pressure, and potential damage to the pump. To prevent air leaks, it’s crucial to ensure that all fittings and connections are properly sealed and tightened. Using Teflon tape or pipe thread sealant on threaded connections can help create a tight seal and prevent air from entering the system. Additionally, checking and replacing any damaged or worn-out gaskets or o-rings is essential to maintain a leak-free system. Regular maintenance and inspections can help identify and address any potential sources of air leaks in the pump system.
Use and Care Manual
Additional information in the provided manual
When installing a new pump, it’s important to consult the use and care manual provided by the manufacturer. The manual contains detailed instructions specific to the pump model, including important information on installation, operation, and maintenance. It may also include troubleshooting tips, safety guidelines, and warranty information. Reading and following the instructions in the manual can help you ensure the proper functioning and longevity of the pump. Keep the manual in a safe place for future reference and consult it whenever needed.


