How to Descale Your Reverse Osmosis System at Home
Welcome to the comprehensive guide on descaling your reverse osmosis (RO) system! Regular maintenance of your RO system is crucial to ensure it functions at its peak. Over time, minerals like calcium and magnesium can build up, leading to reduced efficiency and potential damage. Don’t worry; with the right steps, you can easily descale your system and keep the water flow smooth and clean. Read on for a straightforward, step-by-step approach.
“Maintaining your reverse osmosis system is not just about prolonging its life but ensuring the purity of your water.” – Water Quality Expert
Understanding Mineral Buildup in Reverse Osmosis Systems
Mineral buildup in reverse osmosis (RO) systems occurs when dissolved minerals like calcium, magnesium, and iron accumulate on the membrane surfaces. Over time, these minerals form solid deposits, commonly known as scale, which can hinder the filtration process, reduce water flow, and even damage the delicate RO membranes. Left unchecked, mineral buildup can significantly impair the efficiency of your system, leading to increased operational costs and the need for more frequent maintenance.
These minerals enter your RO system through the feed water and, under certain conditions, precipitate out of solution. Factors such as water composition, temperature, pH levels, and pressure can influence the rate and extent of scaling. For instance, water with high levels of calcium and magnesium, often referred to as “hard water,” is more prone to scaling. Understanding what causes mineral buildup is the first step toward preventing it and ensuring your RO system runs smoothly.
Common minerals that contribute to scale include:
- Calcium Carbonate: Often found in limestone regions, it forms hard, white deposits.
- Calcium Sulphate: Known for its insolubility in water, making it challenging to remove.
- Iron: Can create rusty, orange-colored deposits that clog membranes.
- Magnesium: Similar to calcium, contributes to the hardness of water and scaling.
- Silica: Creates a tough, glass-like coating that is difficult to dissolve.
Descaling an RO system can extend its lifespan by 2-3 years
Why Descaling Your Reverse Osmosis System is Essential
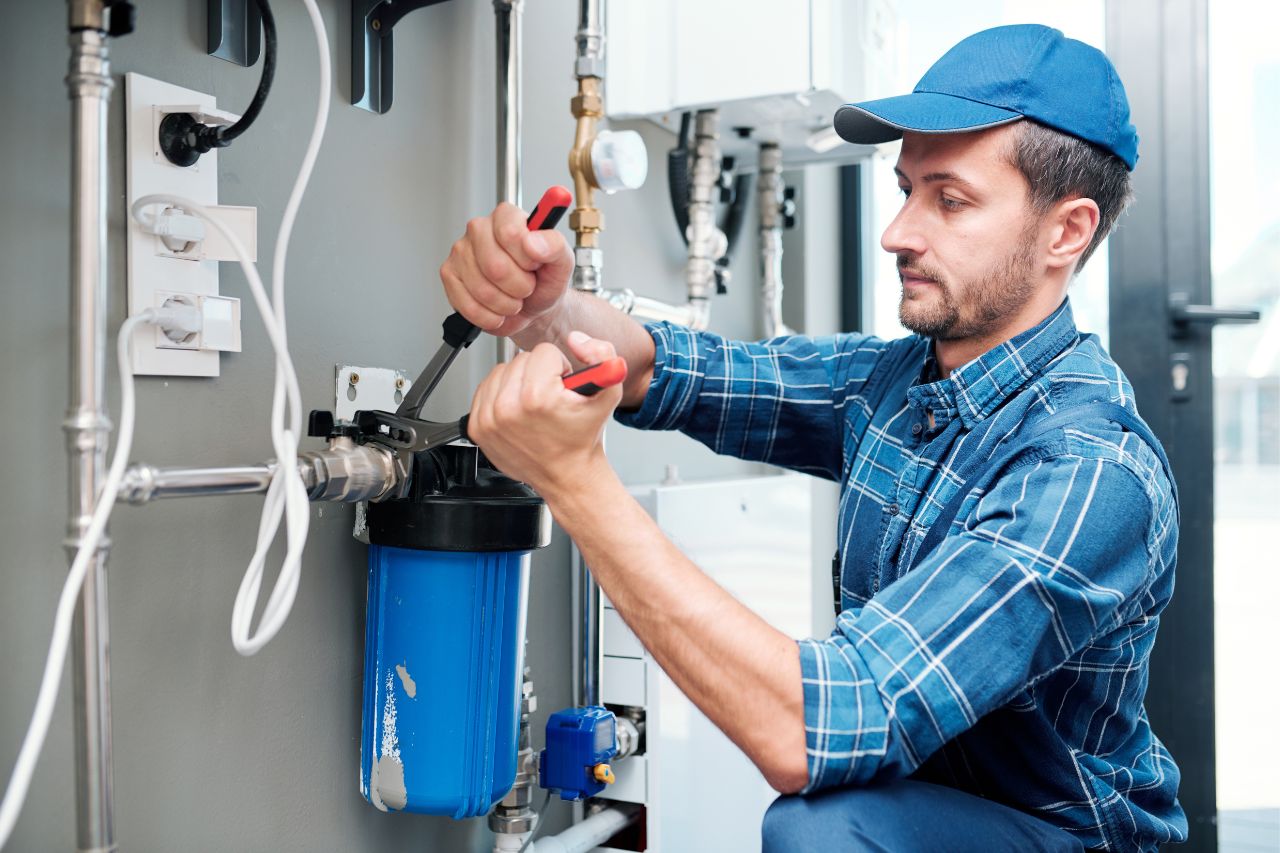
Regular descaling of your reverse osmosis (RO) system is critical to maintain its performance and longevity. Mineral buildup can significantly impair the efficiency and lifespan of the system, leading to potential contamination and costly repairs. To prevent this, follow these detailed steps to descale your RO system effectively.
- Gather Your Materials: Ensure you have the necessary cleaning chemicals, such as an alkaline chelating solution or hydrochloric acid cleaner, depending on the type of buildup. Additionally, you will need protective gear like gloves and goggles.
- Prepare the Cleaning Solution: Mix the cleaning chemicals according to the manufacturer’s instructions. For instance, you might use a solution with 0.1% by weight caustic soda (NaOH) and 0.1% by weight sodium EDTA for alkaline cleaning or 0.5% by volume hydrochloric acid (HCl) for acidic cleaning.
- Isolate the RO System: Shut off the water supply and relieve any pressure from the system. This step is crucial to avoid any accidental contamination or spillage.
- Remove Foulants and Suspended Solids: Before circulating the cleaning solution, ensure that loose foulants and suspended solids are cleaned to prevent contamination. This can usually be done by flushing the system with clean water.
- Circulate the Cleaning Solution: Add the prepared cleaning solution to the system and circulate it through the membranes. Pay attention to pH adjustments if needed. For effective cleaning, maintain a high pH of 11-12, especially when dealing with biofilm, silica, or organic contaminants.
- Soak and Monitor: Allow the solution to soak the membranes for 30-60 minutes. During this time, it’s crucial to monitor the pressure differential across the membrane elements, ensuring it does not exceed 10 PSI per element.
- Drain and Refill: If the cleaning solution becomes very dark or turbid, drain it and prepare a fresh solution. This ensures optimal cleaning and prevents re-contamination.
- Repeat Soaking and Circulating: Continue alternating between soaking and circulating the solution until you are confident that the system is free from any mineral buildup. This might involve adding more cleaning chemicals to adjust the pH as needed.
- Final Flush: After the cleaning process is complete, thoroughly flush the RO system with clean water to remove any remaining cleaning chemicals or disintegrated foulants.
Reverse osmosis systems can remove up to 99% of dissolved salts
Signs It’s Time to Descale Your RO System
Common signs indicating it’s time to descale your reverse osmosis system include a noticeable decline in the water output rate, an increase in the salt content of the product water, and a higher pressure drop across the membrane. Specifically, you should pay attention to:
- Decreased Water Output: If you observe that the water flow rate has dropped by 10% or more from its initial rate, it’s a clear signal that mineral buildup is hindering the system’s performance.
- Increased Salt Passage: An uptick in salt content in the filtered water, by over 5-10%, is another red flag. This means the membrane’s efficiency at rejecting salts is compromised, often due to scale deposits.
- Elevated Pressure Drop: When the pressure drop across the membrane exceeds 10-15% of the normal rate, it suggests clogged membranes struggling to push water through, indicating the need for descaling.
Regular monitoring for these signs can help you maintain the efficiency of your RO system and ensure consistent water quality. Now, let’s walk through the detailed descaling process.
Gathering Your Descaling Supplies
Before you start the descaling process of your reverse osmosis (RO) system, it’s crucial to have all the necessary supplies ready. This ensures a smooth and efficient cleaning process. Here’s a checklist to help you prepare:
- Descaling Solution: Depending on the type of fouling, either an acid or alkaline cleaning agent might be required. Ensure you have RO Clean C AT-2628 for inorganic scale and iron deposit removal.
- Chelating Agents: For comprehensive cleaning, especially to tackle biofilms and organics, you will need a chelating solution consisting of 0.1% caustic soda (NaOH) and 0.1% sodium EDTA.
- pH Testing Kit: To monitor and adjust the pH levels of your cleaning solution, especially if it rises above 4.2 during the descaling process.
- Clean Water Supply: Ensure you have access to a sufficient amount of clean water for preparing your descaling solution and for flushing the system post-cleaning.
- Circulation Pump: A pump to circulate the cleaning solution through the RO system, effectively removing mineral buildup.
- Containers and Measuring Cups: To accurately measure and mix the descaling chemicals.
- Protective Gear: Safety glasses, gloves, and other personal protective equipment to handle the chemicals safely.
- Waste Water Disposal Plan: A method to handle and dispose of the used cleaning solution in an environmentally responsible manner.
Having these supplies on hand will not only make the descaling process more efficient but also ensure that your RO system remains in optimal condition, free from damaging mineral buildup. With everything ready, you can move on to the actual descaling steps with confidence.
Step-by-Step Guide to Descaling Your Reverse Osmosis System
Descaling your reverse osmosis (RO) system is crucial in maintaining its efficiency and prolonging its lifespan. Here’s a comprehensive, step-by-step guide to help you through the process:
- Prepare the System: Turn off the RO system and disconnect it from the power and water supply. Drain any water from the system to ensure it is completely empty. Remove the RO membrane and any pre-filters. This is essential to prevent contamination and ensure the descaling chemicals only target the mineral buildup.
- Initial Rinse: Rinse the system with clean water to remove any loose debris. This preliminary step helps to reduce potential interference from solids or microorganisms during the descaling process.
- Alkaline Cleaning: Prepare a cleaning solution using RO Clean A AT-2040 at a concentration of 3-4% vol/vol. Adjust the pH to 11.0. Heat the solution to a temperature between 35-40°C. Circulate this solution through the system for 4-6 hours. This alkaline clean removes organic fouling and certain mineral scales.
- Flush the System: Thoroughly flush the system with clean water to remove any residual alkaline cleaner. This step is crucial to avoid chemical reactions when the acidic cleaner is introduced.
- Acid Cleaning: Prepare a cleaning solution using RO Clean C AT-2628 at a concentration of 2-3% vol/vol. Adjust the pH to 3.7 and maintain a temperature between 25-30°C. Circulate this solution through the system for around 4-6 hours, or until the pH rises above 4.2. This step is essential for removing inorganic scales, such as iron deposits.
- Second Flush: Flush the system again with clean water, ensuring all acidic cleaner residues are removed. Visual inspection of water samples can help confirm that the system is thoroughly cleaned.
- Inspect and Reassemble: Inspect the RO membrane and pre-filters for cleanliness or any signs of damage. Replace them if necessary. Reassemble the RO system and reconnect it to the power and water supply.
- Final Rinse and Test: Turn on the system and allow it to rinse for a minimum of 30 minutes. Test the water output to ensure the system is operating correctly and efficiently. This step confirms that the cleaning was successful and that the system is free of any descaling chemical residues.
Flushing Your System After Descaling
After successfully descaling your reverse osmosis system, thoroughly flushing the system is of utmost importance. This ensures that all the disintegrated mineral deposits and cleaning chemicals are fully removed, returning your system back to optimal performance.
Start by initiating a rinse with permeate water. Permeate water is the filtered water produced by the RO system, and using it ensures that you’re not introducing any new contaminants. Flush the system until the pH value of the water returns to a neutral level, around pH 7. This is crucial to prevent any residual cleaning chemicals from affecting your water’s quality.
Step-by-Step Flushing Process:
- Initial Flush: Begin with an initial flush using permeate water. Let it run through the system for around 30 minutes, ensuring that the water flows through all the components thoroughly.
- pH Monitoring: Keep a close eye on the pH levels. If the pH is above 4.2, continue flushing and adjust as necessary until it stabilizes at a neutral level.
- Inspect the Water: Observe the flushed water for any signs of turbidity or discoloration. If the water is dark or murky, drain this initial batch and prepare to flush again.
- Second Flush: Perform another flush with fresh permeate water. This second flush is typically shorter, around 15-20 minutes, but still ensures that stubborn residues are removed.
Throughout this process, it’s essential to maintain a consistent flow rate to ensure thorough cleaning. After the flushing is complete, reassemble and reconnect all parts of your RO system as per the manufacturer’s guidelines.
To confirm that the flushing has been effective, you can perform a final test by running the system and checking the water quality. The water should taste clean and have no unusual odors. If any issues persist, consider repeating the flushing process or consulting a professional.
With your system adequately flushed, you’re now ready to resume regular use. Remember to perform these maintenance tasks periodically to keep your reverse osmosis system functioning at its best and providing you with pure, clean water.
In Closing
Descaling your reverse osmosis system is a critical maintenance task that ensures your system operates efficiently and prolongs its lifespan. By following this guide and paying close attention to safety precautions, you can effectively remove mineral buildup and maintain the high quality of your water.
Remember to flush the system thoroughly after descaling to prevent any cleaning agent residues from contaminating your water supply. It’s also a good practice to set a regular descaling schedule based on your water usage and the initial signs of buildup.
Should you encounter any issues or have specific concerns, always refer to your system’s manual or consult with a professional. Routine care and proper maintenance keep your reverse osmosis system running smoothly and deliver the best possible water quality for you and your family.
Thanks for taking the time to learn about this essential process. Your commitment to maintaining your reverse osmosis system will indeed pay off in enhanced performance and longevity.

