Choosing the Best Water Tanks for Your Sprinter Van
Looking to maximize your Sprinter van’s potential for epic road trips and the van life? Consider the crucial aspect of a water storage system. Reliable and efficient water tanks are vital for cooking, cleaning, and staying hydrated on your adventures. With numerous options available, selecting the ideal water tank for your Sprinter van may seem daunting. But worry not! Our ultimate guide covers everything you need to know. We’ll explore different tank types, sizes, and key features to help you make informed decisions. Get ready to equip your van with the best water storage solution, ensuring a convenient and dependable water supply throughout your journey!
What is covered:
- The importance of having a water tank for your Sprinter van.
- The different types of water tanks available for Sprinter vans.
- Considerations for choosing the right size water tank.
- Key features to look for in a water tank.
- Installation tips and tricks.
Why do you need a water tank for your Sprinter van?
Having a water tank in your Sprinter van is essential for a variety of reasons. Firstly, it provides you with a convenient and reliable source of water while on the road. Whether you’re cooking a meal, washing your hands, or simply need a drink, having access to clean water is crucial for a comfortable van life experience. Additionally, having a water tank allows you to be self-sufficient and not rely on external water sources, giving you the freedom to camp in remote areas or stay off-grid for extended periods.
Not only does a water tank offer convenience and independence, but it also promotes sustainability. By carrying your own water supply, you can reduce your reliance on single-use plastic bottles or disposable containers. Instead, you can refill your tank with potable water from various sources, minimizing your environmental impact. So, having a water tank in your Sprinter van is not only practical but also an eco-friendly choice.
Lastly, a water tank can increase the resale value of your Sprinter van. When potential buyers see that your van is equipped with a reliable water storage system, it adds value and appeal to your vehicle. So, investing in a high-quality water tank is not only beneficial for your own use but also a smart decision for the future.
Types of water tanks for Sprinter vans

When it comes to choosing a water tank for your Sprinter van, you’ll encounter different types, each with its own set of advantages and considerations. Let’s explore the most common types of water tanks available for Sprinter vans.
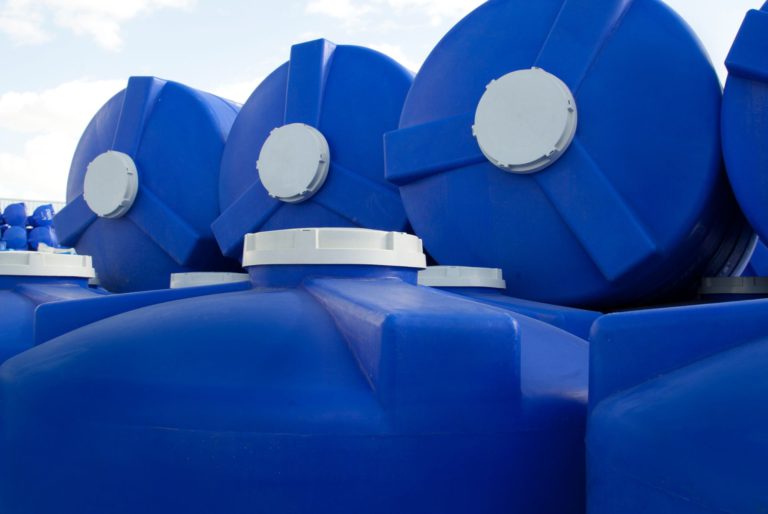
1. Plastic Water Tanks: Plastic water tanks are widely used in Sprinter van conversions due to their durability, lightweight nature, and affordability. These tanks are typically made from food-grade polyethylene or other high-quality plastics, ensuring the water remains safe for consumption. Plastic tanks are available in various shapes and sizes, allowing you to choose one that fits your available space and water storage needs. They are also easy to clean and maintain, making them a popular choice among van lifers.
2. Stainless Steel Water Tanks: If you’re looking for a more robust and long-lasting option, stainless steel water tanks are worth considering. These tanks are corrosion-resistant and can withstand extreme temperatures, making them suitable for all types of climates. Stainless steel tanks are also known for their aesthetic appeal, giving your van a sleek and professional look. However, they tend to be more expensive than plastic tanks and may require additional insulation to prevent heat loss or gain.
3. Flexible Water Bladders: Flexible water bladders are a versatile option for Sprinter van owners who have limited space or irregular-shaped areas for water tanks. These bladders are made from durable materials such as reinforced PVC or polyurethane, allowing them to withstand the rigors of van life. Flexible water bladders can be installed in various locations, including under the van or inside cabinets, maximizing the use of available space. However, they have a smaller storage capacity compared to traditional tanks and may require additional fittings for filling and emptying.
Consider the pros and cons of each type of water tank based on your specific needs, space constraints, and budget before making a decision. Remember to prioritize factors such as durability, ease of installation, and compatibility with your van’s plumbing system.
Considerations for choosing the right water tank size
Choosing the right size of water tank for your Sprinter van is vital to ensure you have an adequate supply without compromising space or weight capacity. Here are some considerations to keep in mind when determining the appropriate water tank size:
1. Water Usage: Evaluate your water usage patterns while on the road. Consider factors such as the number of people traveling in the van, the duration of your trips, and the activities that require water (cooking, showering, etc.). This will give you an estimate of the daily water consumption, allowing you to choose a tank size that can meet your needs without frequent refills.
2. Available Space: Assess the available space in your Sprinter van and identify areas where a water tank can be installed. Measure the dimensions accurately to determine the maximum tank size that can fit without compromising other essential van components or storage space. Keep in mind that the tank’s shape may also impact how it can be installed in your van.
3. Weight Capacity: Consider the weight capacity of your Sprinter van to ensure that the chosen water tank, when filled, does not exceed the recommended limits. Exceeding the weight capacity can affect the vehicle’s performance, fuel efficiency, and safety. Refer to your van’s manufacturer specifications or consult with a professional to determine the maximum weight your van can handle.
By taking these factors into account, you can select a water tank size that strikes the right balance between water storage capacity and van space utilization.
Material options for Sprinter van water tanks
The material of your water tank can impact its durability, weight, and compatibility with your van’s plumbing system. Here are the most common material options for Sprinter van water tanks:
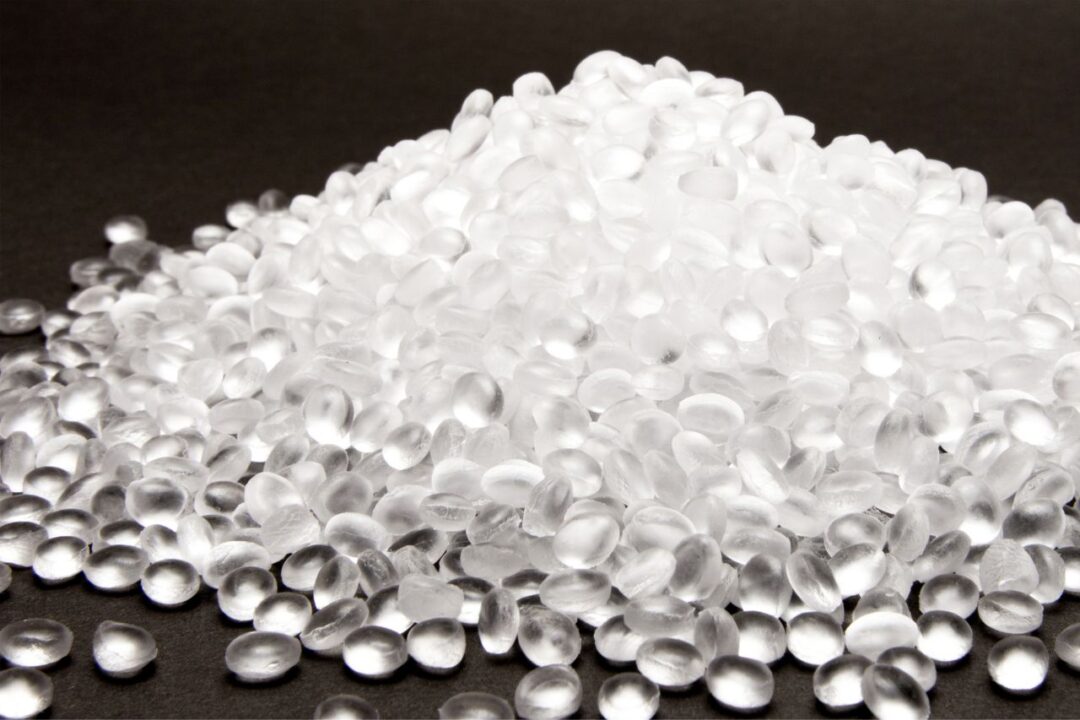
1. Polyethylene: Polyethylene water tanks are popular among van lifers due to their lightweight nature, durability, and resistance to corrosion. These tanks are made from food-grade plastic, ensuring the water remains safe for consumption. Polyethylene tanks are relatively affordable and easy to install. They can withstand various temperatures and are resistant to UV rays, making them suitable for outdoor installations.
2. Stainless Steel: Stainless steel water tanks are a premium option known for their strength, longevity, and resistance to corrosion. These tanks are highly durable and can withstand extreme temperatures, making them suitable for all types of climates. Stainless steel tanks are also hygienic, as they do not leach any chemicals into the water. However, they tend to be heavier and more expensive than plastic tanks.
3. Aluminum: Aluminum water tanks offer a good balance between durability and weight. They are lightweight, making them ideal for van conversions where weight capacity is a concern. Aluminum tanks are resistant to corrosion, but they may require additional treatment or coating to ensure water quality. They are relatively expensive compared to plastic tanks but more affordable than stainless steel tanks.
Consider the specific advantages and limitations of each material option based on your requirements, budget, and overall van conversion plans. It’s essential to choose a material that not only provides a reliable water storage solution but also aligns with your van’s aesthetics and functionality.
Features to look for in a water tank for your Sprinter van
When selecting a water tank for your Sprinter van, certain features can enhance its functionality and convenience. Here are some key features to look for:
1. Built-in Water Pump: A built-in water pump allows for easy water flow and distribution from the tank to various outlets, such as faucets or showers. Look for a tank that includes a reliable and efficient water pump to ensure a consistent water supply throughout your van.
2. Integrated Filtration System: An integrated filtration system helps maintain water quality by removing impurities, sediments, or contaminants. Look for tanks that have built-in filters or options to connect external filtration systems for clean and safe water consumption.
3. Level Indicator: A level indicator provides a visual representation of the water level in the tank. This feature allows you to monitor the remaining water capacity and plan for refills accordingly, avoiding unexpected water shortages.
4. Multiple Outlet Ports: Having multiple outlet ports in the tank enables you to connect different water systems within your van, such as taps, showers, or even an external hose for outdoor use. This feature provides flexibility and convenience when using water for various purposes.
5. Insulation: Insulated water tanks help maintain water temperature, preventing excessive heat loss or gain. This feature is particularly beneficial if you plan to use your van in extreme climates or during colder seasons.
Consider which features are essential for your specific van lifestyle and prioritize them during the selection process. Keep in mind that additional features may come with a higher price tag, so weigh the benefits against your budget and overall requirements.
Installation tips for water tanks in Sprinter vans
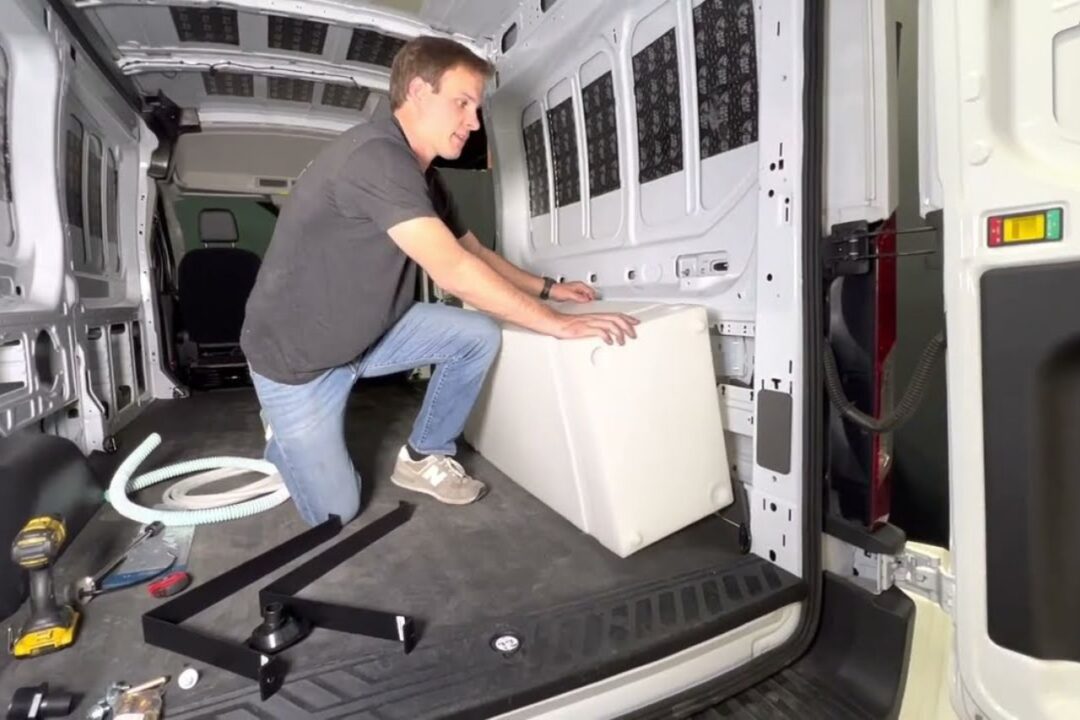
Installing a water tank in your Sprinter van requires careful planning and consideration. Here are some installation tips to ensure a successful setup:
1. Choose the Right Location: Identify the most suitable location for your water tank based on available space, ease of access, and compatibility with your van’s plumbing system. Consider areas that are well-protected from extreme temperatures, vibrations, or potential damage during travel.
2. Secure the Tank: Properly secure the water tank to prevent movement or damage while driving. Use brackets, straps, or custom-fitted installations to ensure the tank remains stable during bumpy rides or sudden stops.
3. Connect Plumbing System: Connect the water tank to your van’s plumbing system using appropriate fittings, hoses, and connectors. Ensure a watertight connection and conduct thorough testing before using the water system.
4. Ventilation: Install ventilation or venting systems to prevent the buildup of pressure or odors within the tank. Proper ventilation helps maintain water quality and prevents any potential issues caused by trapped air or gases.
5. Consider Insulation: If you plan to use your van in colder climates, consider insulating the water tank to prevent freezing. Insulation can help maintain water temperature and prevent damage to the tank or plumbing system.
If you’re not confident in your DIY skills, it’s advisable to consult with a professional or hire an experienced van conversion specialist to ensure a safe and efficient installation. Proper installation is crucial for the functionality and longevity of your water tank.
Maintenance and care for Sprinter van water tanks
To ensure the longevity and optimal performance of your Sprinter van water tank, regular maintenance and care are necessary. Here are some essential maintenance tips:
1. Clean the Tank: Regularly clean the water tank to prevent the buildup of sediment, algae, or bacteria. Empty the tank completely and use a mixture of water and a mild cleaning agent to scrub the interior. Rinse thoroughly to remove any residue before refilling the tank.
2. Check for Leaks: Inspect the tank and all plumbing connections for any signs of leakage. Address leaks immediately to avoid water damage to your van or the tank itself. Replace any damaged fittings or connectors promptly.
3. Flush the System: Periodically flush the entire water system, including pipes, faucets, and filters, to remove any accumulated debris or contaminants. This process helps maintain water quality and prevents clogging or blockages.
4. Replace Filters: If your water tank has an integrated filtration system or uses external filters, ensure regular replacement or cleaning of the filters as recommended by the manufacturer. This ensures efficient filtration and prevents any buildup of impurities.
5. Inspect for Damage: Regularly inspect the tank for any signs of damage, such as cracks, bulges, or corrosion. Address any issues promptly to prevent further damage or potential water leaks.
By following these maintenance practices, you can extend the lifespan of your water tank and ensure a continuous supply of clean and safe water during your van adventures.
Popular water tank brands for Sprinter van conversions
Several reputable brands offer high-quality water tanks specifically designed for Sprinter van conversions. Here are some popular brands worth considering:
1. Dometic: Dometic is a well-known brand in the RV and van conversion industry, offering a wide range of water tanks suitable for Sprinter vans. Their tanks are known for their durability, easy installation, and compatibility with various plumbing systems.
2. Vetus: Vetus specializes in marine and mobile water systems, making them a trusted choice for Sprinter van owners. Their tanks are designed to withstand harsh conditions, provide efficient water flow, and offer flexible installation options.
3. Aqua-Tank: Aqua-Tank offers a variety of water tanks designed specifically for van conversions. Their tanks are made from food-grade materials, come in various sizes, and feature innovative designs that optimize space utilization.
4. Sure Marine Service: Sure Marine Service is known for its expertise in marine and RV systems, including water tanks. Their tanks are built to withstand rugged conditions, ensure efficient water distribution, and meet the specific needs of van lifers.
When choosing a water tank brand, consider factors such as reputation, customer reviews, warranty coverage, and availability of spare parts or accessories. Researching and comparing different brands can help you make an informed decision that aligns with your requirements and budget.
Cost considerations for Sprinter van water tanks

The cost of a Sprinter van water tank can vary depending on factors such as size, material, brand, and additional features. Plastic water tanks are generally more affordable, with prices ranging from $50 to $300, depending on the capacity. Stainless steel tanks tend to be more expensive, starting from $200 and going up to $1000 or more, depending on the size and brand. Flexible water bladders are usually the most budget-friendly option, with prices ranging from $50 to $150, depending on the capacity and brand.
It’s essential to consider the cost in relation to the quality and longevity of the water tank. Investing in a high-quality tank may initially seem more expensive, but it can save you money in the long run by providing a reliable and durable water storage solution.
Remember to factor in additional costs such as installation materials, fittings, connectors, and any necessary accessories when budgeting for your water tank setup. It’s also advisable to set aside a contingency budget for any unforeseen expenses or professional installation if needed.
Key Takeaways:
- Having a water tank in your Sprinter van provides convenient and reliable access to water while on the road.
- Carrying your own water supply reduces reliance on single-use plastic bottles and promotes sustainability.
- A water tank increases the resale value of your Sprinter van.
- Plastic water tanks are durable, lightweight, and affordable, while stainless steel tanks are more robust and long-lasting.
- Flexible water bladders are versatile and can be installed in limited or irregular-shaped spaces.
- Consider factors like water usage, available space, and weight capacity when choosing the right water tank size.
- Common materials for water tanks include polyethylene, stainless steel, and aluminum, each with its own advantages and limitations.
- Regular maintenance, such as cleaning the tank, checking for leaks, flushing the system, replacing filters, and inspecting for damage, ensures optimal performance and longevity.